Tuesday, November 30, 2010
Orchid Over Mt. Monadnock
On this dreary New Hampshire morning, I look up from my work and notice how the orchid's silhouette creates a lovely line against the mountain in the distance.

Monday, November 29, 2010
Googly-Eyed Owl and New Projects

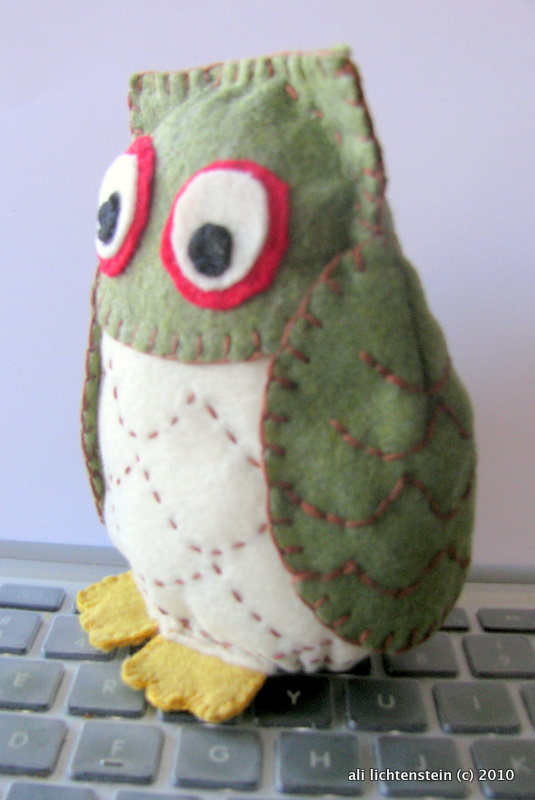
This is from a Simplicity pattern for pin cushions (#2990). As usual, it's made from a combination of wool and recycled felt. Now, back to the quilt design board.
Saturday, November 27, 2010
Functional Quilt
 |
| 76" x 94" |
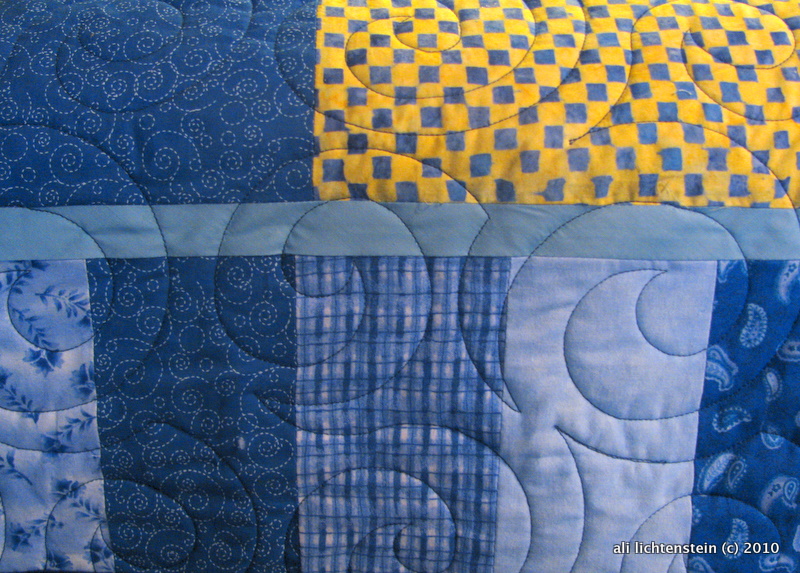 |
| Detail of "Swirl" quilt pattern |
This is the first quilt I haven't quilted myself--it was just too large for my sewing machine and too difficult to handle on crutches. I'm quite pleased with The Quilt Studio (see Links). They have a two week turn-around time--even during this gearing-up-for-the-holiday season!
Ceramic star, quilted and matted
Chris Justice creates functional and fun pottery at her studio in West Peterborough, NH. She was glazing with rich blues and browns when I visited during the Dublin Art Tour in September.

I mounted the star after echo quilting by hand, using salmon fabric (a soft, well-worn napkin) for the base and brown and off-white cotton embroidery thread for the quilting.
Now I eat my cereal and soup from one of her lovely pale blue bowls.
 |
| 12 x 12 square matted to 8" x 8" |

I mounted the star after echo quilting by hand, using salmon fabric (a soft, well-worn napkin) for the base and brown and off-white cotton embroidery thread for the quilting.
Now I eat my cereal and soup from one of her lovely pale blue bowls.
Giving Thanks for Family and Friends
In spite of my ambivalence about the myths surrounding this national holiday, I am grateful for the opportunity to gather with loved ones.

My two daughters, two sons, two nephews and mother-in-law.
Thursday, November 25, 2010
The Sisterhood of Found Objects
I changed the background fabric from a commercial pattern to a scrap of my own discharge design, and added (or rather I'm thinking about adding) found metal embellishments--a pin and two earring fronts; the backs are "feathers" on their heads.
 |
| This little art quilt is slowly evolving. |
Wednesday, November 24, 2010
Catnip mouse...er, rat!
Thomasina, my 13-month-old stray rescue cat, loves to play. I got distracted from bird-making long enough to make her a catnip toy. I tried for a mouse, of which we have plenty here in the country, but it seems to me I got a rat.

You decide.
My latest bird
It's a gull, it's a pigeon, no...it's a Nellie's Needles Bird!


Tuesday, November 23, 2010
Handcrafted Doll Tutorial
The link below takes you to a great soft doll tutorial from
grosgrainfabulous.blogspot.com:
grosgrainfabulous.blogspot.com:
Handcrafted Doll Tutorial!!!!

Fast, Fun, Feckless Doll
Yesterday, in my ongoing search for design ideas for easy-to-make so-called "charity" dolls, I found this funny little "Ruby Doll #1," a free online pattern provided by Jhoanna Monte of One Red Robin. Found it, printed it, made it--fast and fun! Cotton, felt, Lumiere paint (for face), wool roving for stuffing, buttons and ribbon.
 |
| See the link for One Red Robin to get the free Ruby Doll pattern. |
Monday, November 22, 2010
Found Objects


And one felt "doll front" soon morphed into three.

As I cut the shapes and attached buttons and beads for breasts, it occurred to me that maybe these won't be small dolls after all, but rather, perhaps, parts of an art quilt.

Out came the stash. This is my favorite so far. This may grow into my SAQA donation to benefit the New England Quilt Museum during the New England SAQA show in January, 2011, "No Holes Barred" (see link under to New England Quilt Museum under the category "Giving Back"). Or not--it's too early in the process to know.
Sunday, November 21, 2010
Art Quilt in Process
At first I planned on putting together a quick, simple nine-patch block to make a pillow. Now that I've spent a couple evenings hand quilting to outline and/or echo the patterns on the commercial fabric, this seems to be turning into a small art quilt. As always, time will tell.
 |
| About 14" square at this stage Below are two detail images of the hand quilting: |


Saturday, November 20, 2010
Sweet, funky doll
I've been working on simple samples of soft dolls and animals in order to create a model to use for making small toys to give to children in difficult situations. I'd also like to organize and lead some workshops at drop-in shelters and similar places as a way to teach basic sewing skills and give others the opportunity to pass on gifts they've made.

With her unbleached muslin head, torso, and arms, and commercial fabric legs and feet, this doll is a funky composite of ideas and techniques stored in my head. She's stuffed with unbleached wool roving except for her feet, which are filled with noisy, crunchy dried organic buckwheat hulls.*


Note her "joints" at the elbows, hips and knees. She can sit or kneel (with support).
* Organic dried buckwheat hulls are clean and light; they make great filling for some projects. My source is J. Crow's Marketplace (see link). They also have wonderful dried flowers, oils, and other related products.
Thursday, November 18, 2010

Wednesday, November 17, 2010
Kokeshi Inspired
After making some kokeshi dolls from the Melly and Me pattern, I decided to alter the embroidery design and doll shape to try and make a Chinese doll from the Japanese model. Cultural appropriation aside, with apologies, I think I'm getting there.


My move to Beijing is fast-approaching and I would like to have a few dolls in hand to give to children I meet and also to use as samples for possible workshops. I've found Japanese doll patterns and manufactured dolls aplenty, but next to none for Chinese children. Perhaps I'll be able to educate myself a bit more once I'm there and able to explore.

Monday, November 15, 2010
Kokeshi/Matryoshka Inspired Dolls
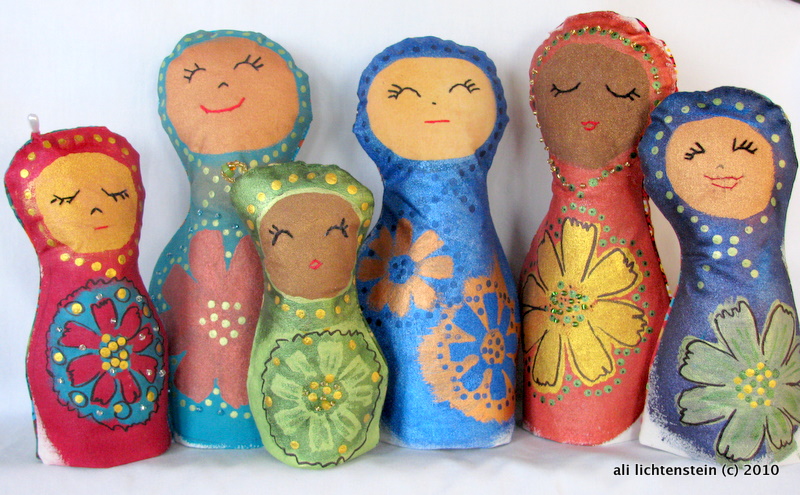 |
| These dolls were inspired by the Cloth Paper Scissors Reader Challenge, "Stenciled Garden." |
Fronts of finished (or nearly finished) dolls. I hand stitched the facial features and machine stitched the outline of the body. After clipping seams and turning, I stuffed loosely with unbleached wool roving. They have small bases of lightweight cardboard, so they stand on their own.

The back view.

Each doll has her own distinct personality.
Wednesday, November 10, 2010
Painted Dolls
I've been experimenting with Lumiere fabric paints since using them in Melanie Testa's Soy Wax Resist Workshop at Create! in Chicago this summer.

I penciled a loose doll outline on unbleached muslin--something between a kokshei and matryoshki shaped figure.

Next, I painted the base layer and, after giving it about 30 minutes to dry, I stenciled and masked the flower from Cloth Paper Scissors' Reader's Challenge, "stencil garden" (see link for Cloth Paper Scissors and then go to "Reader's Challenge" to learn more and/or participate). Note: Putting a towel under the fabric helps speed drying time.

Three dolls are 4.5-5.5" high and three are 7-8" high.
I added dots with paint and lines with permanent marker.

Next, I matched fabric from my stash to the dolls "fronts." which are still just painted muslin in these photos.


Below are the three larger doll fronts and matching fabric for the backs.

Subscribe to:
Posts (Atom)